Expo Web in 2025: How AI-Powered Tools Are Supercharging Development
From code refactoring to instant SEO, AI is transforming Expo Web workflows, here’s how I slashed dev time on a real project.


A few years ago, GitHub Copilot felt like a revelation, churning out types and functions while I sipped coffee. But in 2025, AI’s role in development has leveled up, especially with Expo Web. In a world where AI is rewriting how we code, Expo Web’s simplicity makes it the perfect playground. Recently, I converted a chunky Expo side project into a web app in just six weeks, half the time I’d budgeted. The secret? Swapping VSCode for Cursor and leaning hard into its Claude-powered AI. Here’s how AI supercharged my Expo Web experience, with real examples and a few lessons learned.
Cursor vs. VSCode, Why I Switched
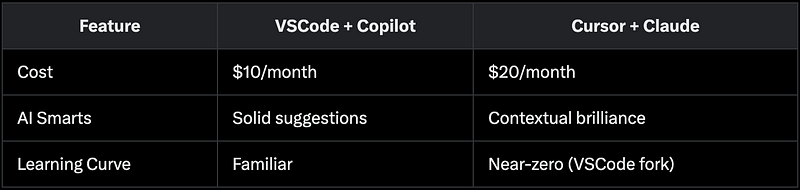
Cursor, a VSCode fork, made the leap painless. It auto-imported my plugins, mirrored the interface, and threw in a smarter AI for $20/month (vs. Copilot’s $10 Pro tier). Was the extra $10 worth it? Night-and-day difference. Copilot was a helpful assistant, but Cursor’s Claude integration felt like a co-founder. Let’s dive into what it did for my Expo Web project.
Refactoring Made Ridiculous
I use Tamagui for UI, and my <TamaguiTextArea> was a mess, stuffed with inline styles begging to be a styled component. I asked Claude to refactor it.
Before:
<TamaguiTextArea
  value={value}
  h={height}
  placeholder={placeholder}
  onChangeText={onChangeText}
  onBlur={onBlur}
  maxLength={maxLength}
  fontFamily="$body"
  backgroundColor="$frameBackground"
  borderWidth={0}
  px={10}
  py={0}
  verticalAlign="top"
  focusStyle={{ outlineColor: "transparent", outlineWidth: 0 }}
/>
After:
const StyledTextArea = styled(TamaguiTextArea, {
  name: "StyledTextArea",
  fontFamily: "$body",
  backgroundColor: "$frameBackground",
  borderWidth: 0,
  px: 10,
  py: 0,
  verticalAlign: "top",
  focusStyle: { outlineColor: "transparent", outlineWidth: 0 },
});
Sure, I could’ve done this myself, but saving five minutes here and there adds up. Plus, Claude nailed Tamagui’s styled-component syntax, a win for Expo Web, where not every React Native library plays this nice.
Fixing Expo Web’s Experimental Edges
I flipped on Expo Web’s experimental tree-shaking feature. Everything worked, except my Clerk login screen, which slid half-off the page. I pointed this out to Claude, expecting a quick CSS fix. Instead, it jumped to my app folder and dropped a +html.tsx file:
import { type PropsWithChildren } from "react";

export default function Root({ children }: PropsWithChildren) {
  return (
    <html lang="en" style={{ height: "100%", margin: 0, padding: 0 }}>
      <head>
        <meta charSet="utf-8" />
        <meta httpEquiv="X-UA-Compatible" content="IE=edge" />
        <meta name="viewport" content="width=device-width, initial-scale=1.0, viewport-fit=cover" />
        <style dangerouslySetInnerHTML={{
          __html: `
            html, body, #root { height: 100% !important; margin: 0; padding: 0; overflow: hidden; }
            * { box-sizing: border-box; }
          `,
        }} />
      </head>
      <body>
        <div id="root" style={{ height: "100%", display: "flex", flexDirection: "column" }}>
          {children}
        </div>
      </body>
    </html>
  );
}
This fixed it instantly in production. I didn’t even know Expo Router supported custom HTML files like this! Without Claude, I’d burn an hour debugging a feature so new it barely has forum threads. AI didn’t just solve it, it taught me something.
Pro Tip: Don’t sleep on Expo Router’s +html.tsx, it’s a hidden gem for taming web quirks fast.
Platform-Specific Smarts
My home screen had a <Frame> component with slight layout tweaks for web and mobile. Laziness struck, so I split them into two files. Days later, I regretted it and asked Claude to unify them.
Unified Component:
import { ClipboardList, Timer } from "@tamagui/lucide-icons";
import { router } from "expo-router";
import React from "react";
import { Circle, Heading, XStack } from "tamagui";
import { Frame } from "../shared/Frame";
import { Paragraph } from "../shared/Paragraph";

type TaskFrameProps = { type: "todo" | "progress"; taskCount?: number };

const TaskFrame = ({ type, taskCount }: TaskFrameProps) => (
  <Frame
    f={1}
    gap={0}
    br={20}
    py={15}
    px={20}
    width={"50%"}
    $platform-native={{ gap: "$5", paddingHorizontal: 15 }}
    pressable
    onPress={() => router.push(`/board?column=${type}`)}
  >
    <XStack f={1} gap="$2">
      <Paragraph f={1} secondary>
        {type === "todo" ? "To-Do" : "In Progress"} Tasks
      </Paragraph>
      <Circle backgroundColor={type === "todo" ? "$toDoColor" : "$progressColor"} size={40}>
        {type === "todo" ? <ClipboardList size={25} color="white" /> : <Timer size={25} color="white" />}
      </Circle>
    </XStack>
    <XStack gap="$2" alignItems="flex-end">
      <Heading size="$10" lineHeight={45}>{taskCount ?? 0}</Heading>
      <Paragraph mb={4} size="$6" lineHeight={20} $platform-native={{ marginBottom: 7 }} fontWeight="700">
        Tasks
      </Paragraph>
    </XStack>
  </Frame>
);

export default TaskFrame;
Using $platform-native for mobile tweaks was genius. Cleaner code, less duplication, Claude turned my sloppiness into elegance.
SEO in Seconds
Mid-project, I realized my web app’s SEO was nonexistent. I asked Claude to optimize it. It revisited the +html.tsx file and added:
import { type PropsWithChildren } from "react";

export default function Root({ children }: PropsWithChildren) {
  const title = "Bankan - Project Management Made Simple";
  const description = "Streamline your project management with Bankan. Organize tasks, collaborate, and track progress efficiently.";
  return (
    <html lang="en" style={{ height: "100%", margin: 0, padding: 0 }}>
      <head>
        <title>{title}</title>
        <meta charSet="utf-8" />
        <meta httpEquiv="X-UA-Compatible" content="IE=edge" />
        <meta name="viewport" content="width=device-width, initial-scale=1.0, viewport-fit=cover" />
        <meta name="description" content={description} />
        <meta name="theme-color" content="#296d9b" />
        <meta property="og:title" content={title} />
        <meta property="og:description" content={description} />
        <meta property="og:type" content="website" />
        <meta property="og:image" content="/og-image.png" />
        <meta name="twitter:card" content="summary_large_image" />
        <meta name="twitter:title" content={title} />
        <meta name="twitter:description" content={description} />
        <meta name="twitter:image" content="/og-image.png" />
        <link rel="canonical" href="https://bankan.tech" />
        <link rel="manifest" href="/manifest.json" />
        <link rel="apple-touch-icon" href="/apple-touch-icon.png" />
        <style dangerouslySetInnerHTML={{
          __html: `
            html, body, #root { height: 100% !important; margin: 0; padding: 0; overflow: hidden; }
            * { box-sizing: border-box; }
          `,
        }} />
      </head>
      <body>
        <div id="root" style={{ height: "100%", display: "flex", flexDirection: "column" }}>
          {children}
        </div>
      </body>
    </html>
  );
}
Researching Expo Router SEO would’ve taken at least an hour. Claude did it in 20 seconds. My app’s now search-engine ready, no sweat.
Conclusion: Expo Web + AI = Dev Nirvana
Pair Cursor’s AI with Expo’s ecosystem, and you’ve got a cheat code for cross-platform apps. My project’s proof: a complex web conversion, done fast, with cleaner code and zero rabbit holes. In 2025, AI isn’t just a tool, it’s a partner. Try it yourself, your next Expo Web app might finish itself.
Try BanKan Board — The Project Management App Made for Developers, by Developers
If you’re tired of complicated project management tools with story points, sprints, and endless processes, BanKan Board is here to simplify your workflow. Built with developers in mind, BanKan Board lets you manage your projects without the clutter.
Key Features:
- No complicated processes: Focus on what matters without the overhead of traditional project management systems.
- Claude AI Assistant: Get smart assistance to streamline your tasks and improve productivity.
- Free to Use: Start using it without any upfront cost.
- Premium Features: Upgrade to unlock advanced functionality tailored to your team’s needs.
Whether you’re building a side project, managing a team, or collaborating on open-source software, BanKan Board is designed to make your life easier. Try it today!